iOS Performance Tests with Apptim
With the newly released update of Apptim Desktop: 2.1.3, we bring important changes to users, such as improvements in configuring iOS devices to run tests and our Apple device catalog, which will now display accurate information that was previously incorrect in some cases.
That said, what is Apptim Desktop and how do I use it to perform performance tests on iOS mobile applications?
Apptim Desktop
Apptim Desktop is a tool developed by Apptim that allows mobile app developers and testers to evaluate the performance of their applications. This tool focuses on measuring and analyzing various performance aspects, such as CPU usage, memory, battery, and network, among others, during the application’s execution on physical devices.
Main features
- Performance Monitoring: Provides detailed metrics on the application’s and device resource usage, helping to identify bottlenecks and performance issues.
- Session Recording: Allows recording of application and device usage sessions to analyze behavior and performance in different usage scenarios.
- Detailed Reports: Generates comprehensive reports with graphical and detailed information about the application’s and device’s performance.
- Cross-Platform Support: Compatible with both Android and iOS applications.
How to run a Performance Test on Mac?
Current Setup
- Macbook Air 15 M2 / MacOS 15 Beta Sequoia / 8GB RAM
- iPhone XS / iOS 17.5.1
First of all, we need to configure the device so that Apptim Desktop can find and use it. This involves the following steps:
- Trust the device with our computer (User action required)
- Enable Developer Mode (only necessary if iOS >= 16, Apptim will do this for us if we give permissions)
- Mount Developer Image (Apptim will do this for us)
For more information on how to set up your device, click here.
Let’s say our test is based on understanding how much CPU our application is consuming, specifically, how much it is consuming considering the CPU of the entire device while our application is running.
But… how do we do it? The term we’re looking for is: Threshold
The following steps indicate how to create a threshold that alerts us in the report when the value of the Max. Device CPU metric exceeds certain limits.
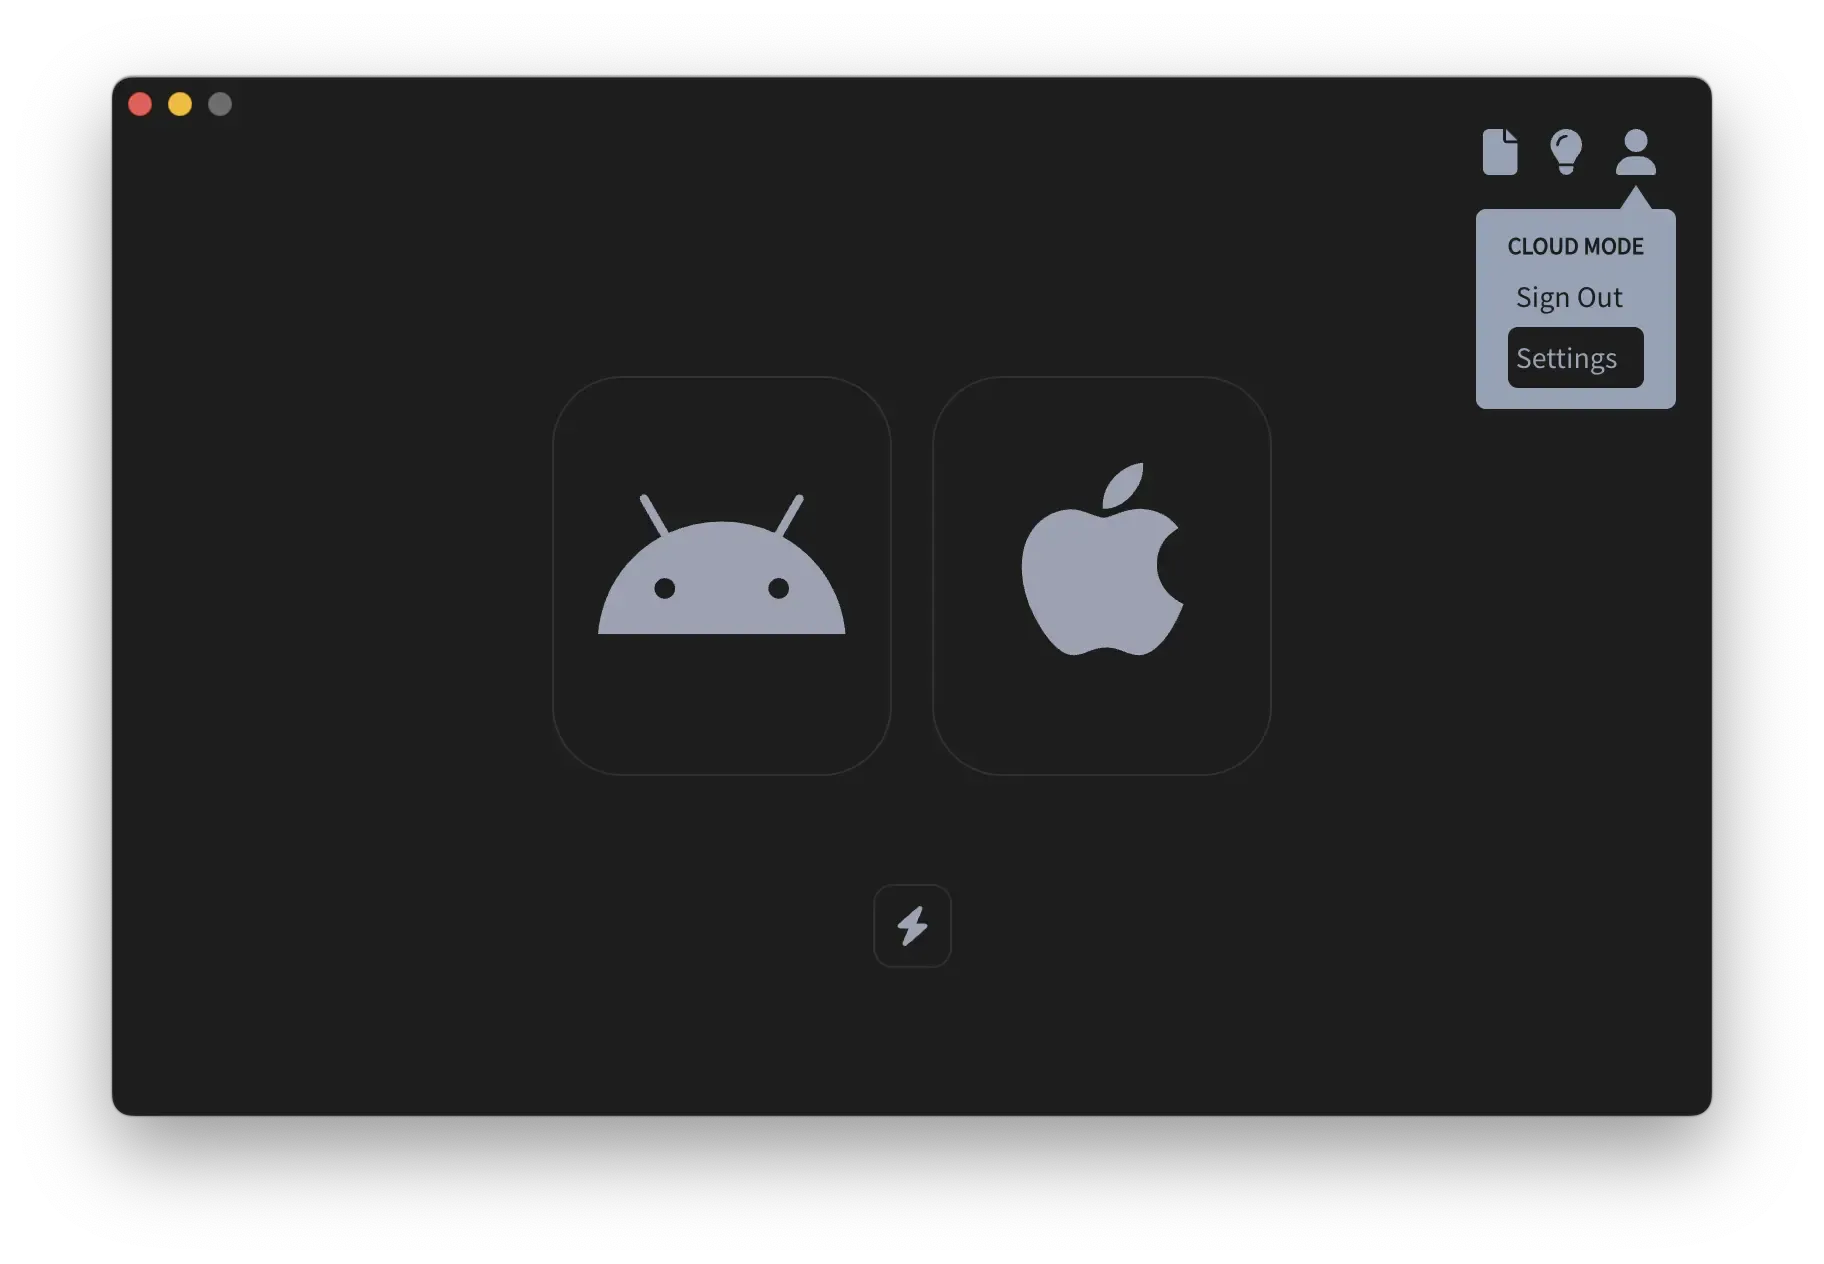
In Desktop, click on the user icon and select the “Settings” option.
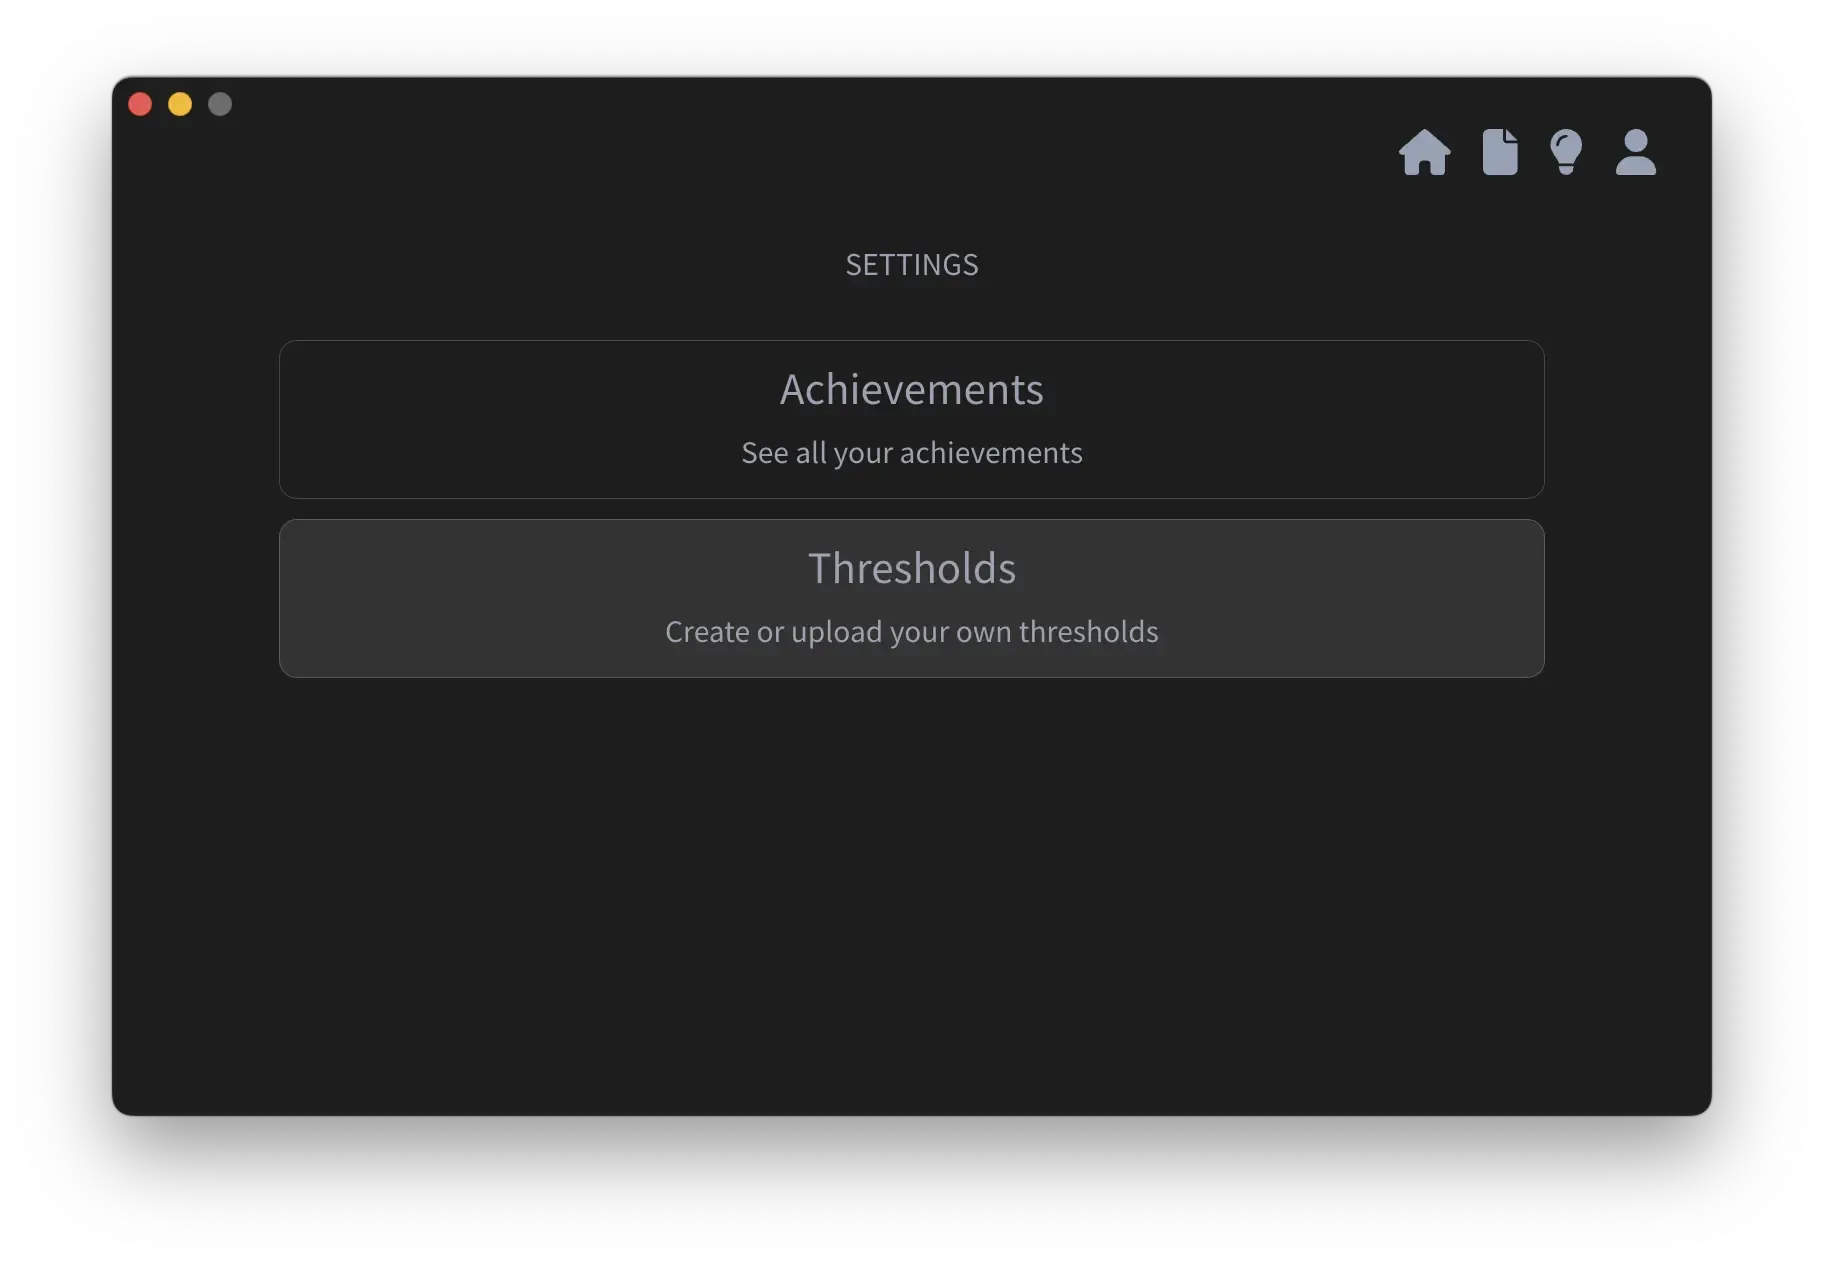
Then, select the “Thresholds” option.
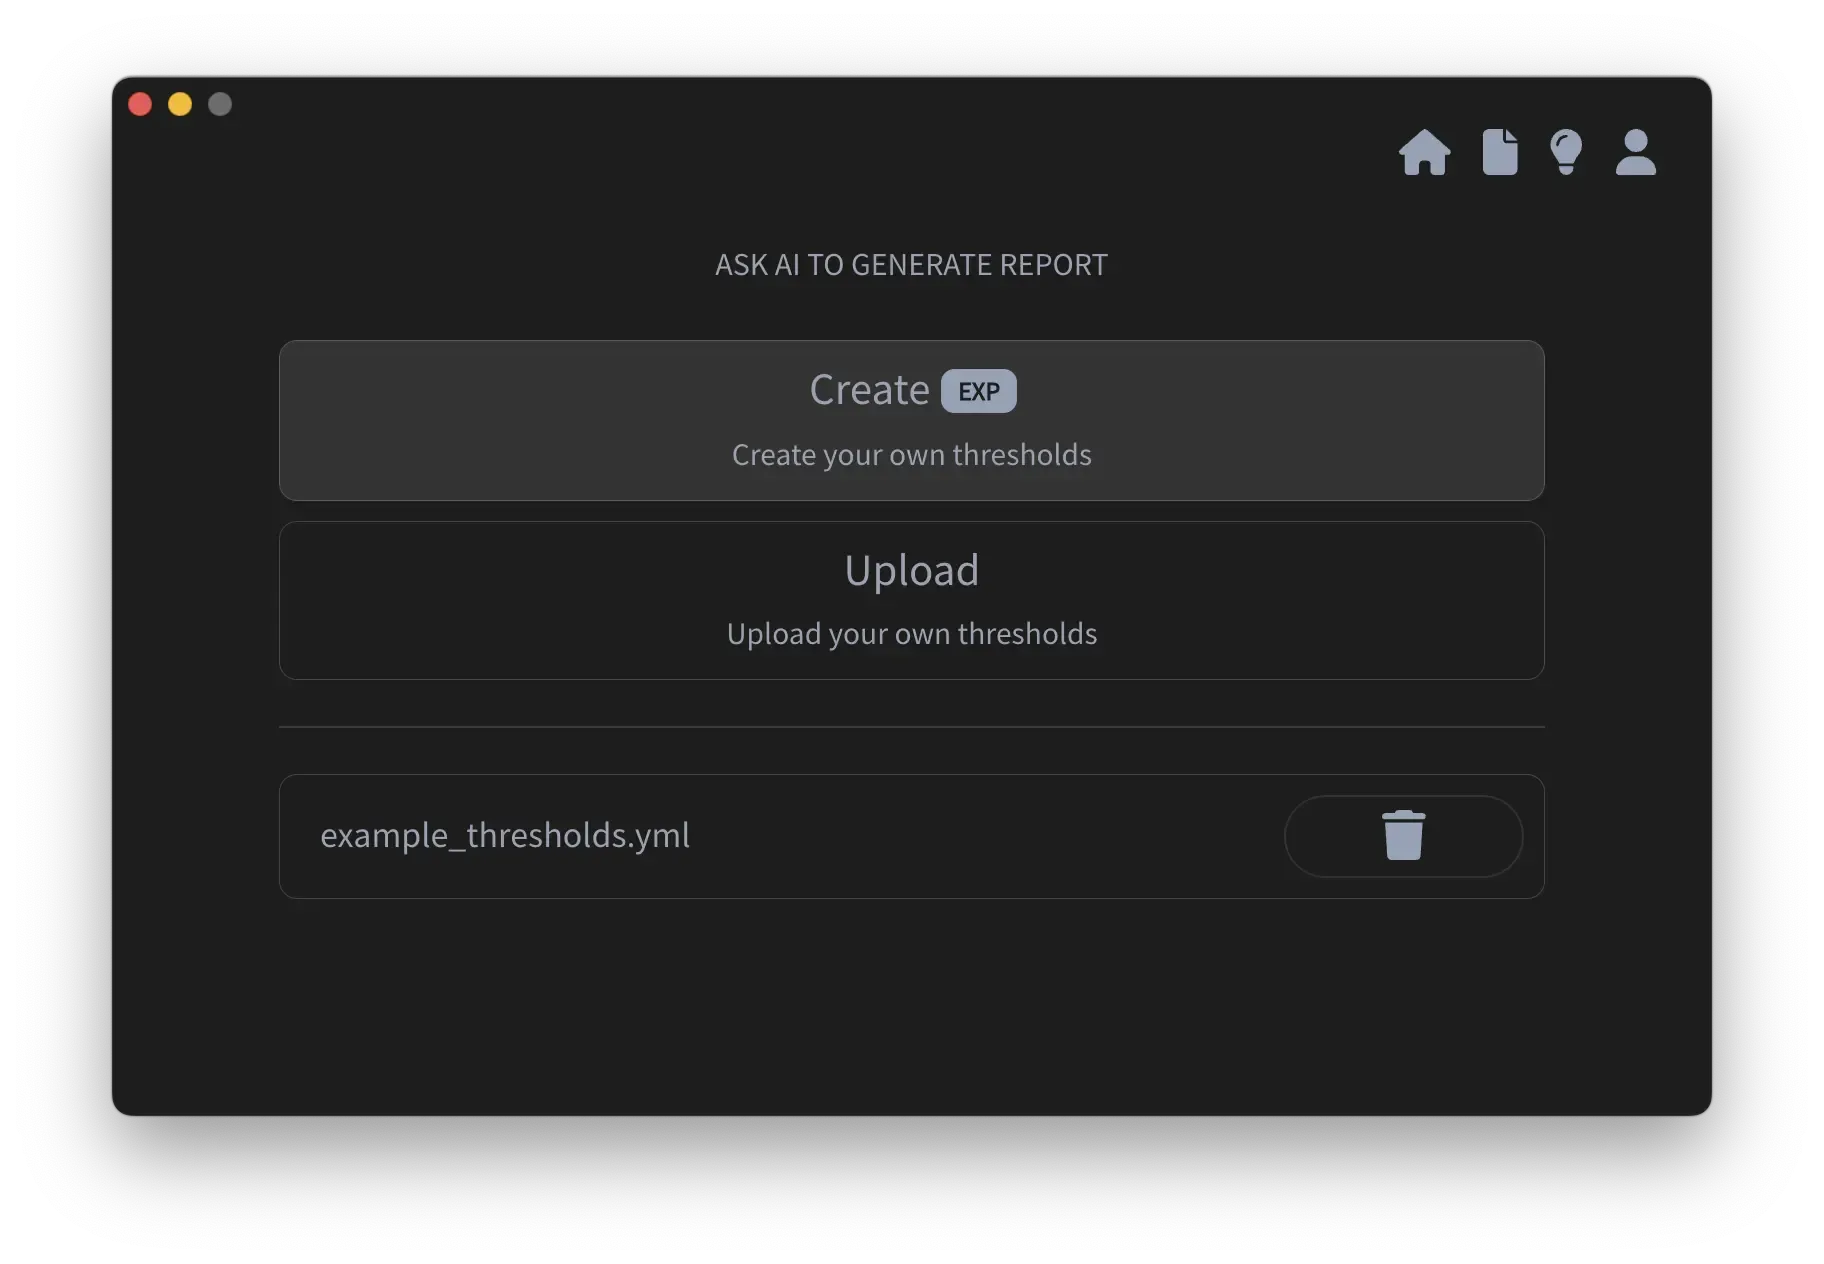
In Thresholds, proceed to select the “Create” option.
Once you see the following screen, select the metric you want to add a Threshold for, in this case: CPU
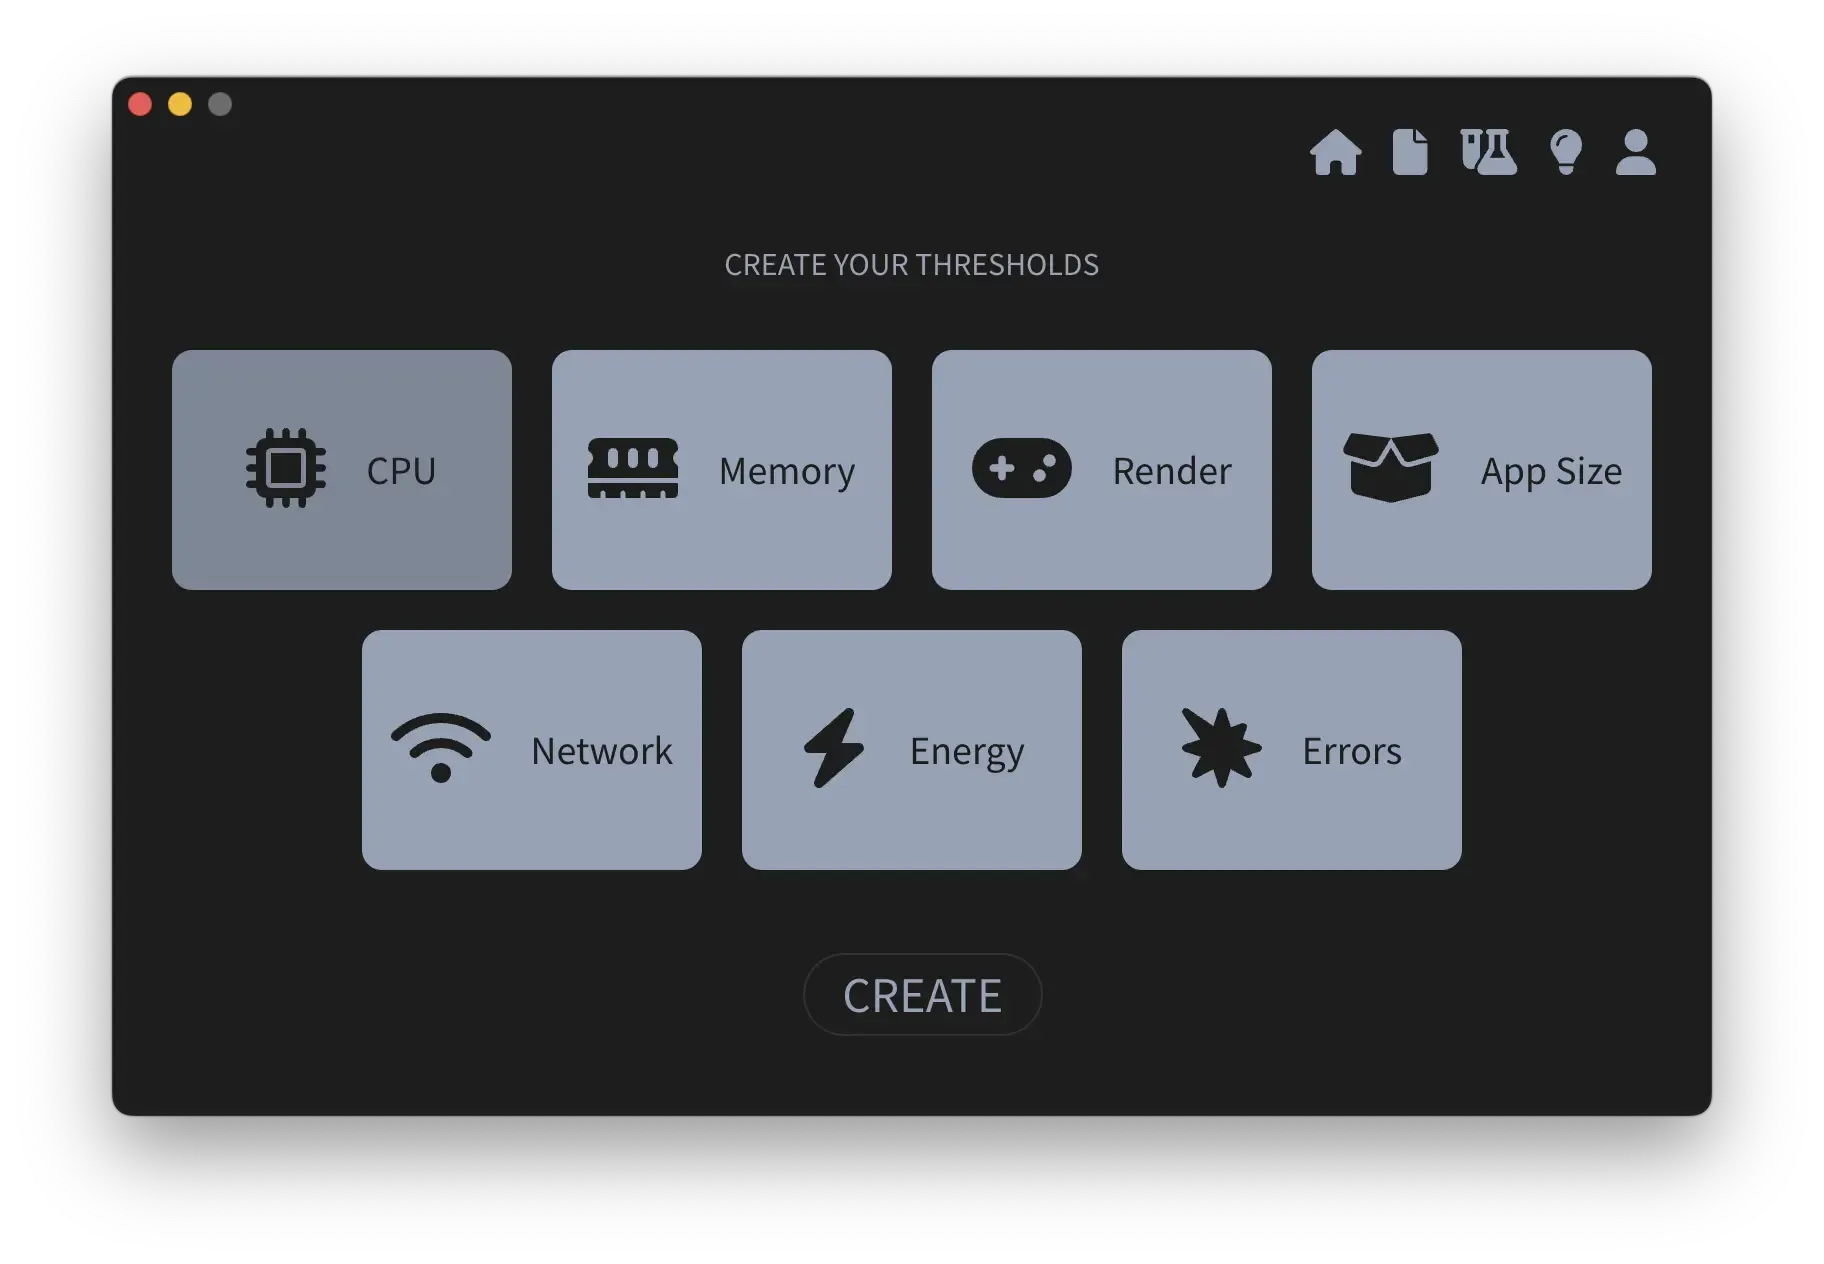
Here, we will expand the list to see all available metrics for CPU.
In this case, we will choose Max. Device CPU as mentioned earlier. If you want to know more about existing metrics, click here.
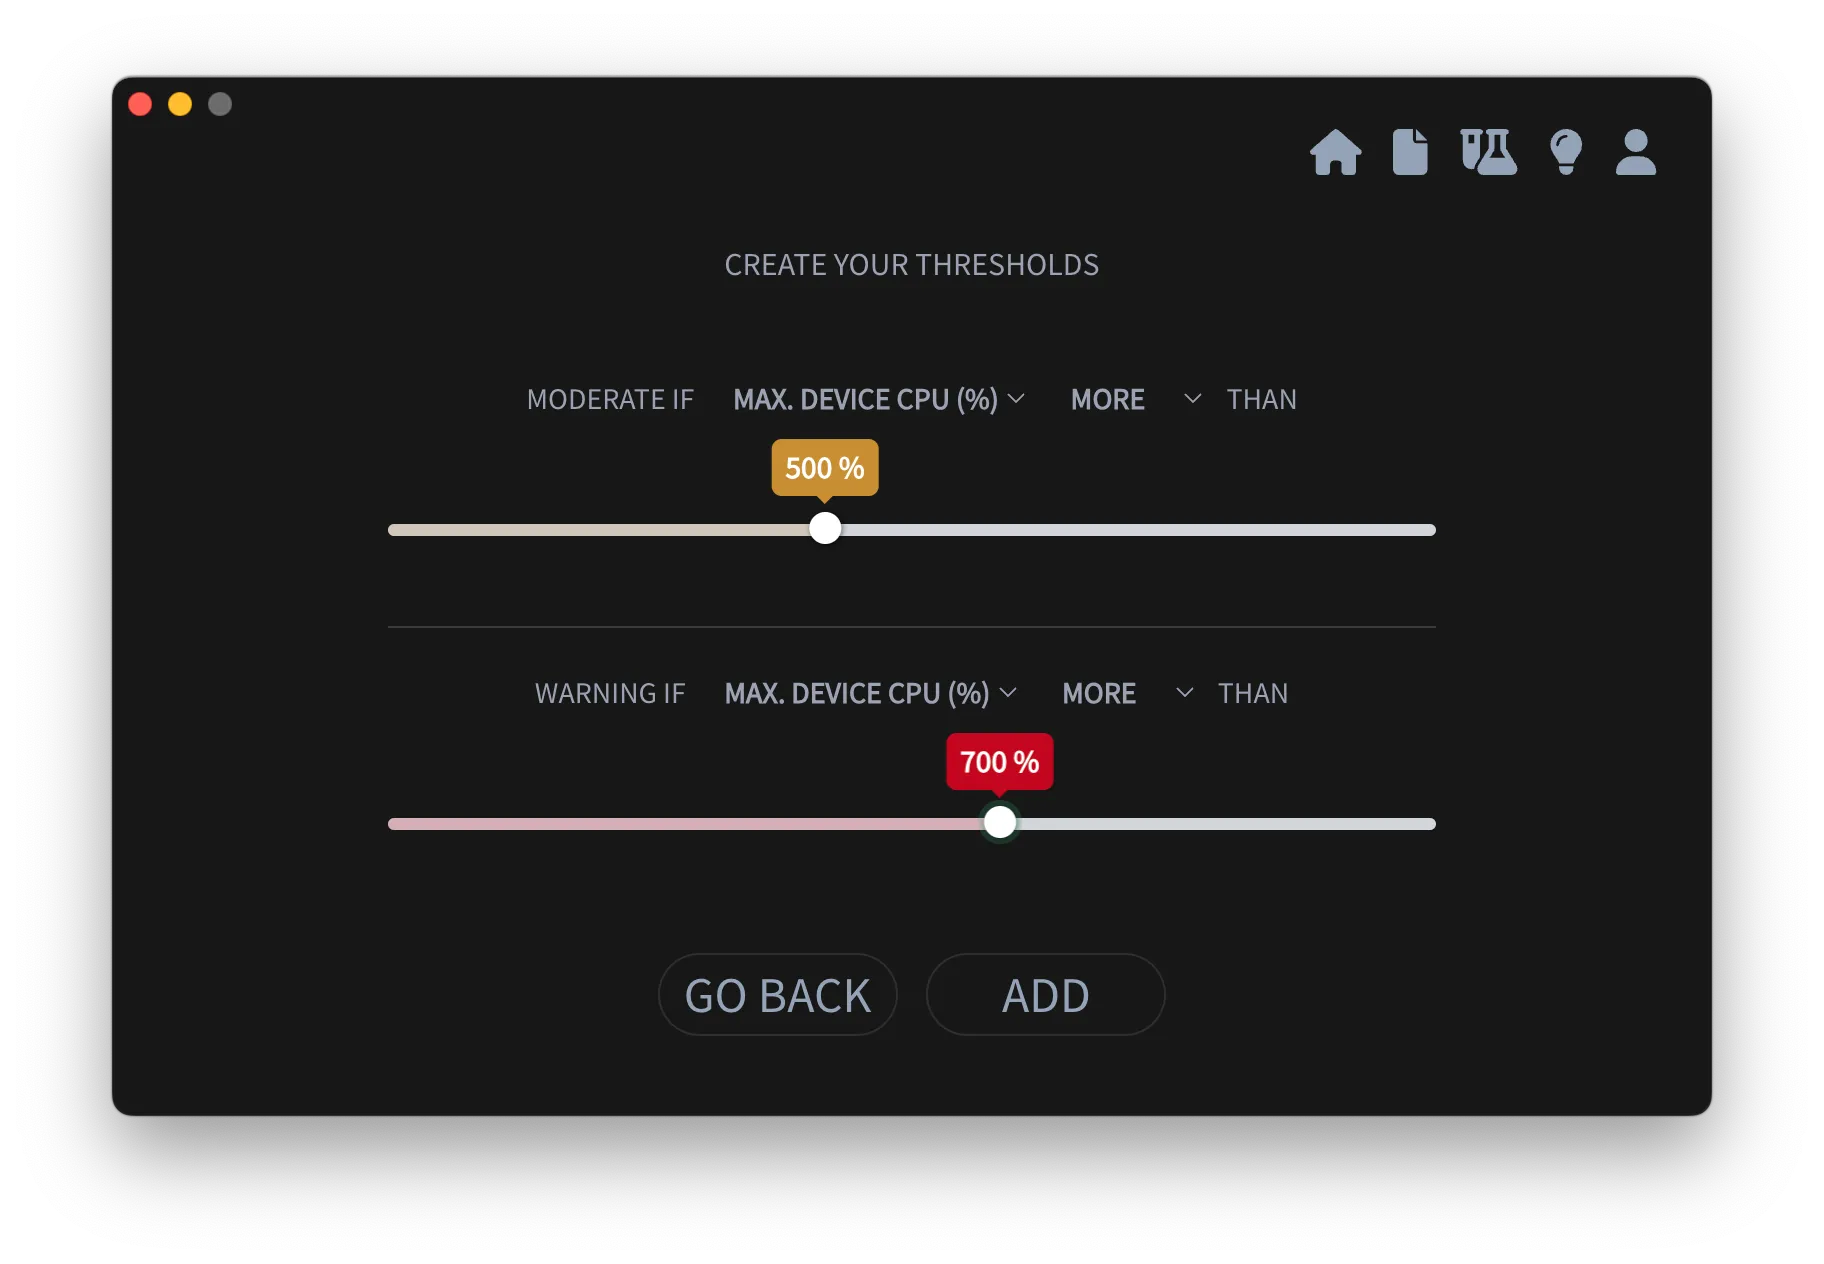
To continue, click the “Add” button, go back to where you saw all the listed categories, and press the “Create” button, give your Thresholds file a name, and press “Create” again.
If there’s something you didn’t understand, check the official documentation here.
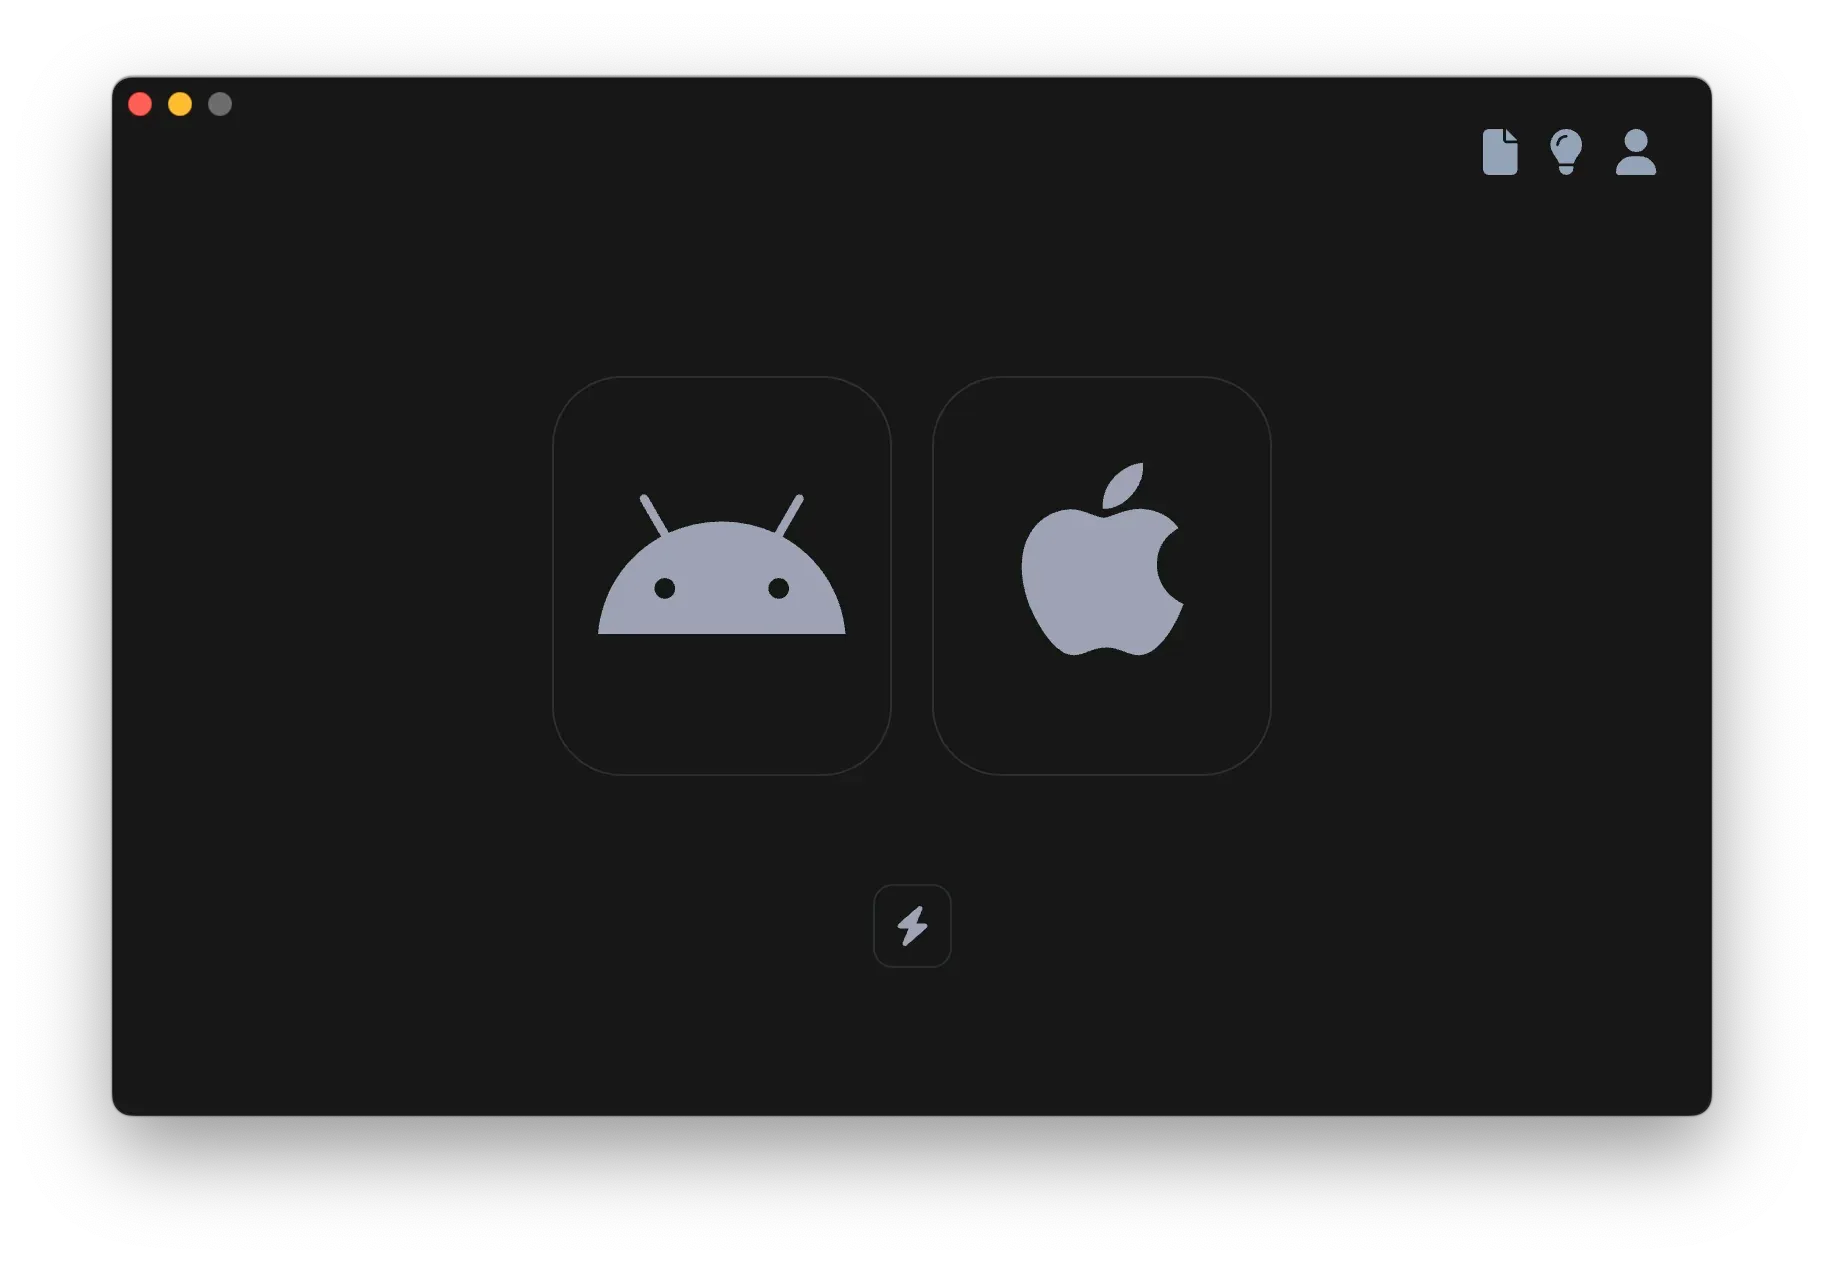
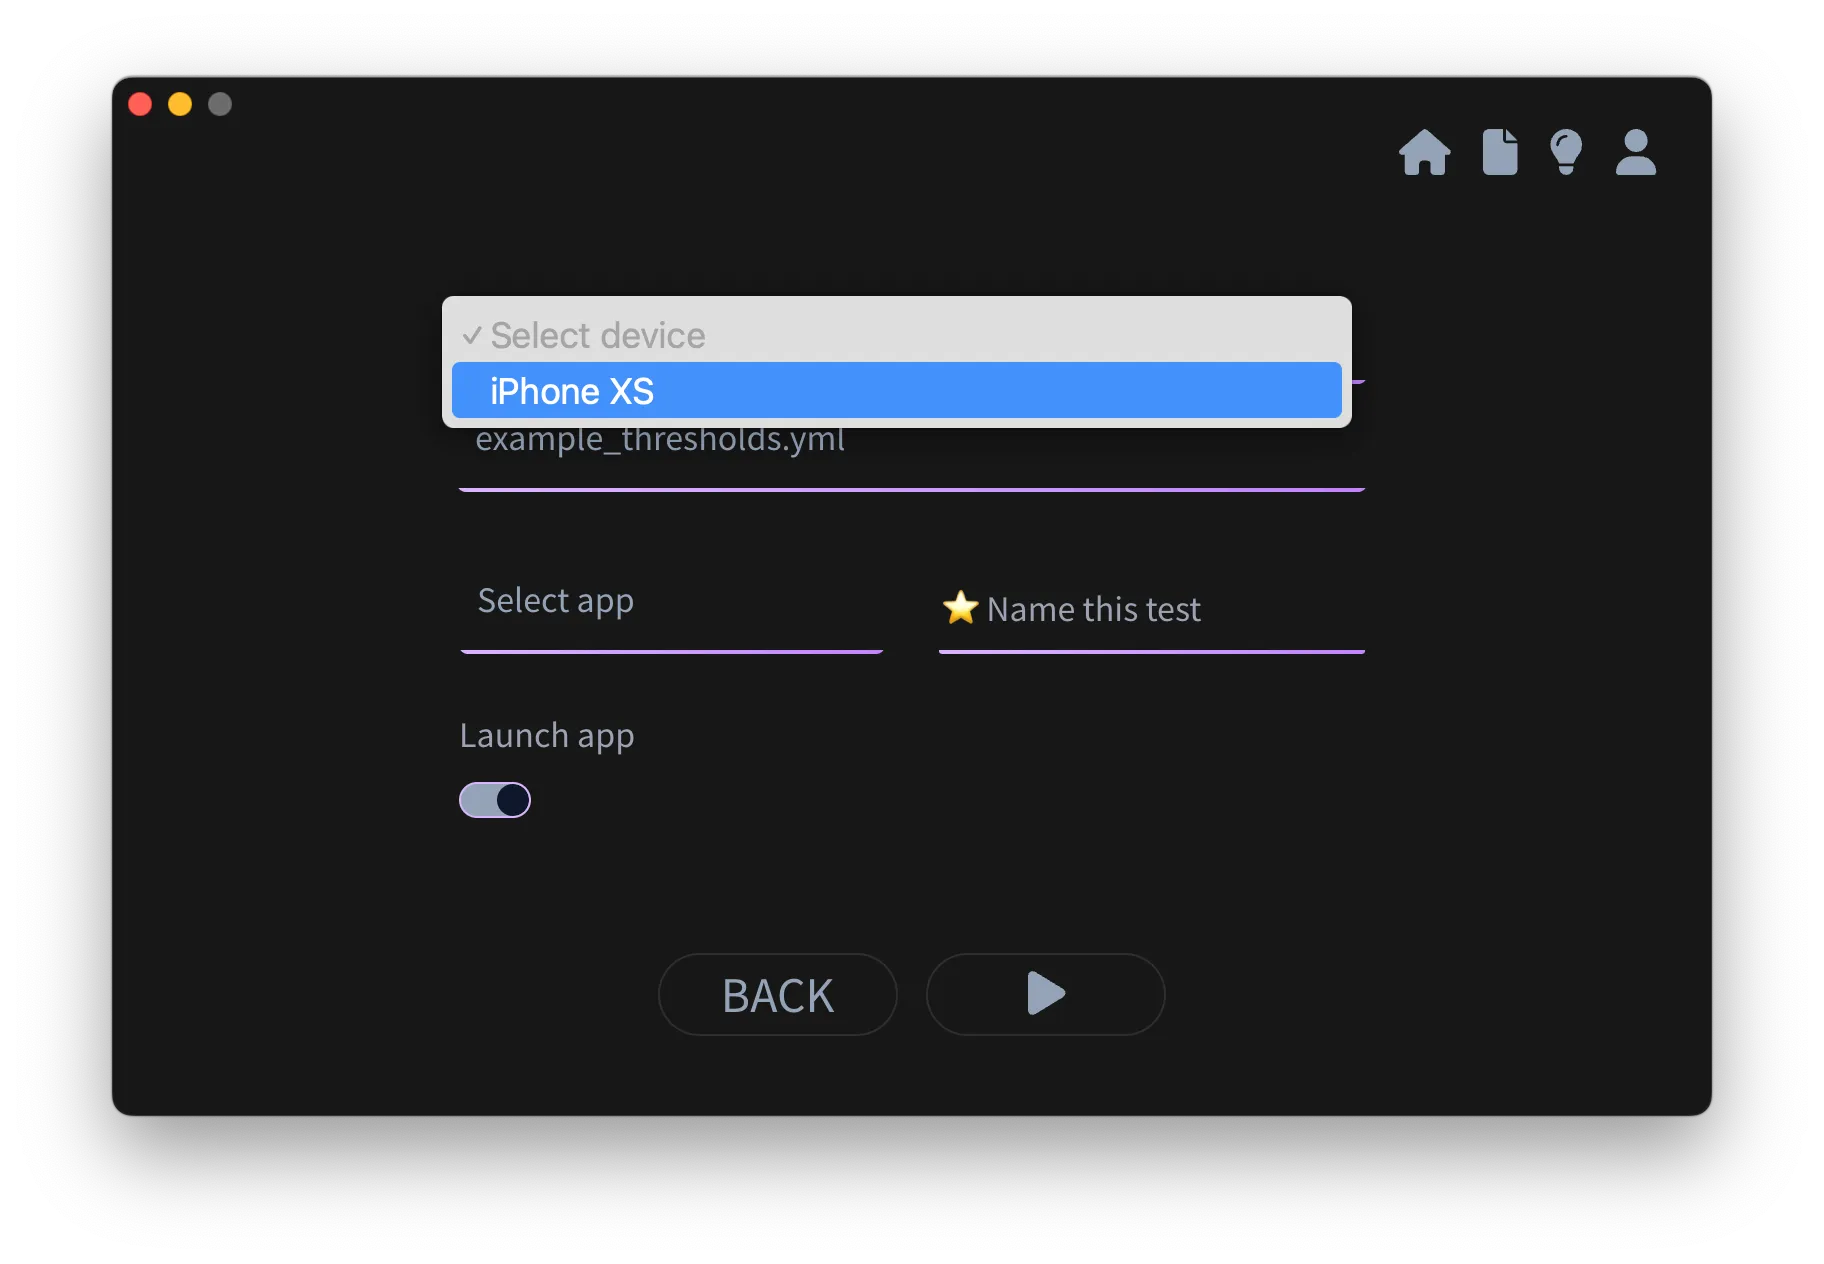
Once your device is configured following the previously mentioned steps, in Desktop from your Mac, select (Apple).
Next, choose the device you are going to use from the list:
Once you select your device, if you are on iOS 17 or higher, you will be prompted for permissions to create trusted tunnels. This is necessary to establish a connection. If you want to know more about why this permission is necessary, you can read more here.
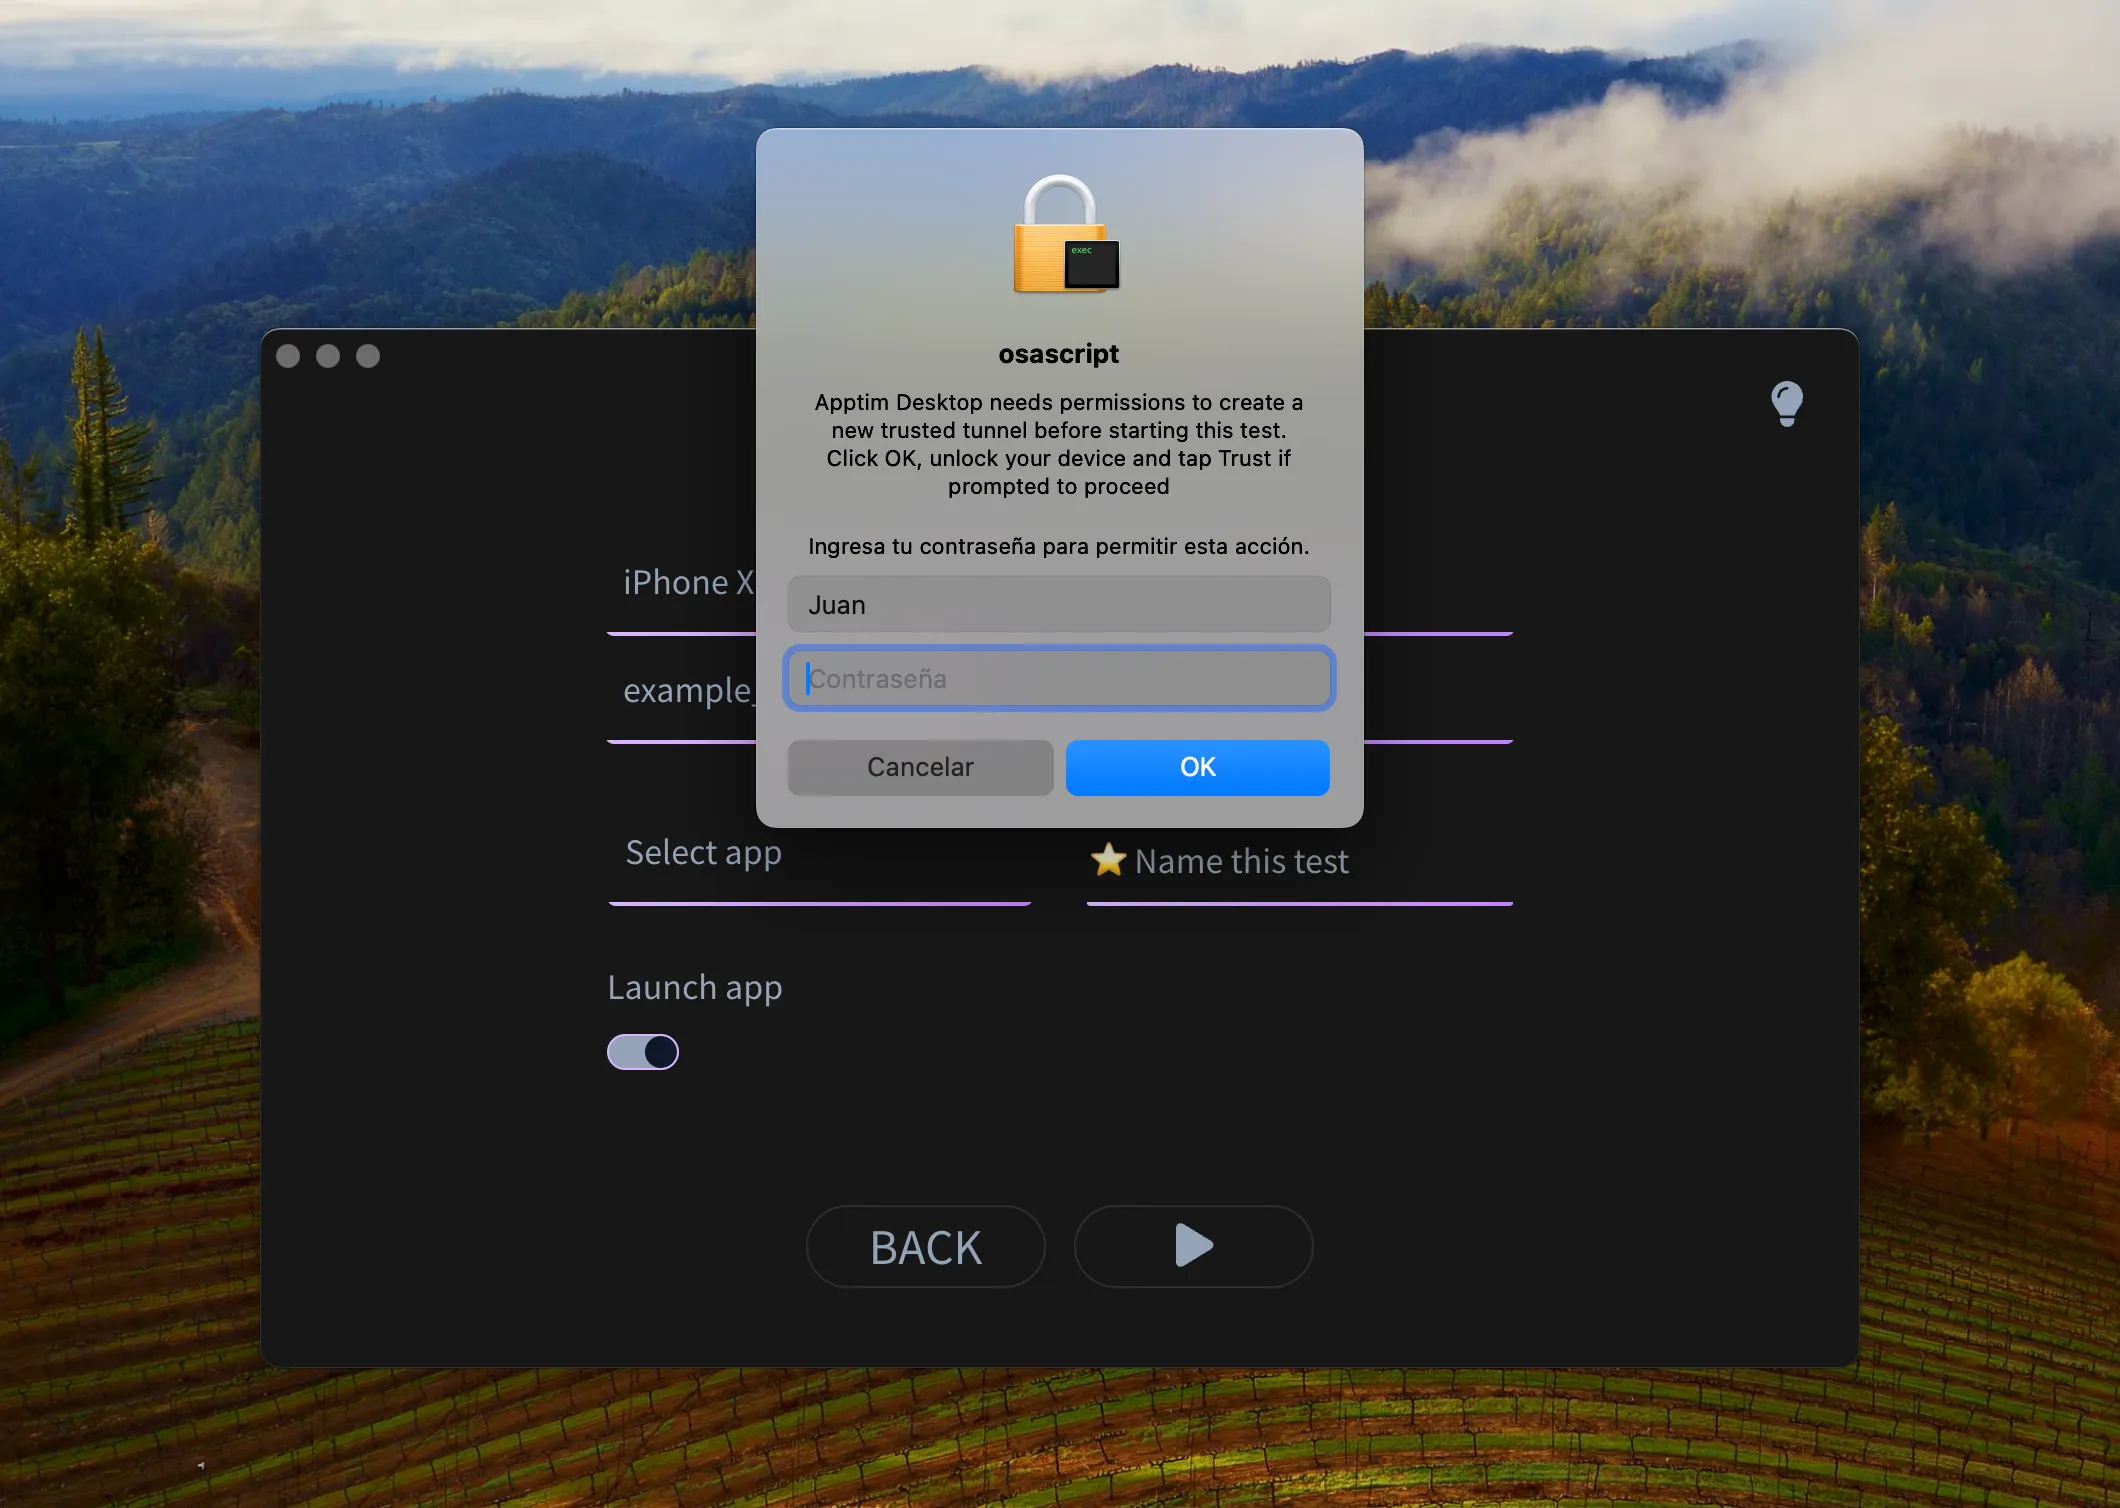
If this is the first time you are performing this action, you may see this message on your device, simply choose the “Trust” option to continue creating trusted tunnels. If you ignore this message or choose the “Don’t Trust” option, you will receive an error.

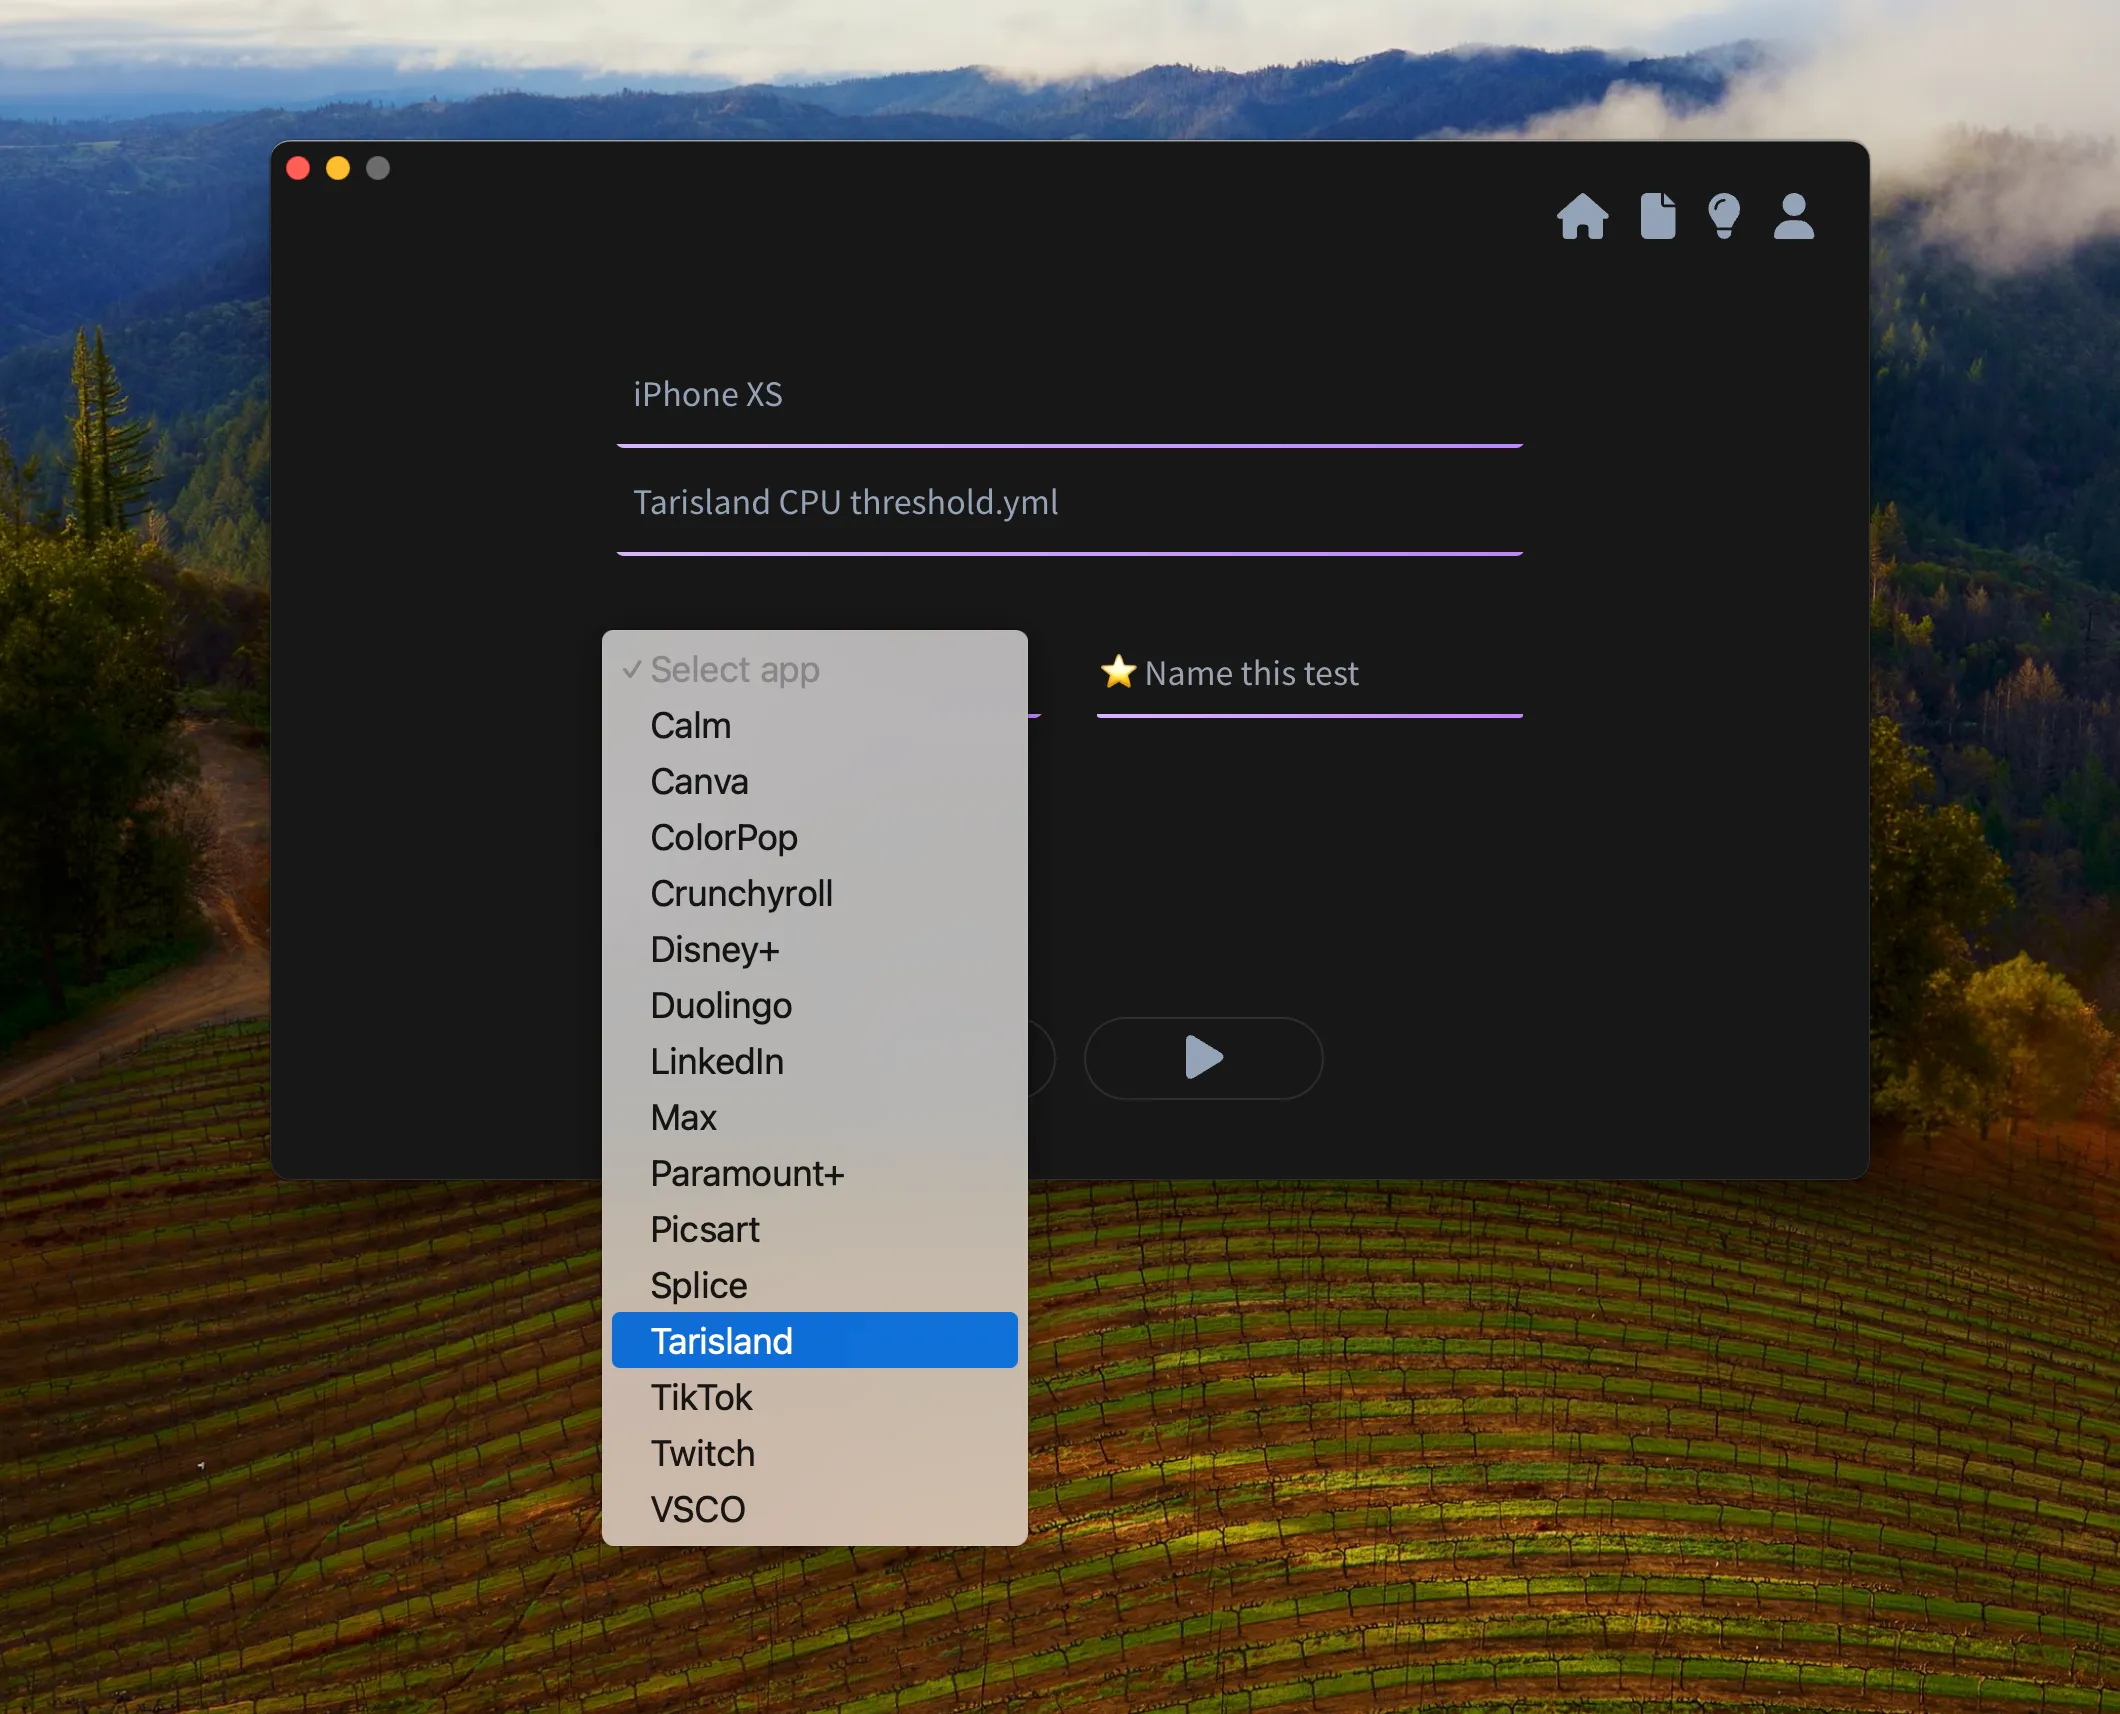
It’s time to select which application we want to test, expand the list of applications and select the desired option, choose the Threshold we just created, give your test a name, and press the ▶ (Play) button.
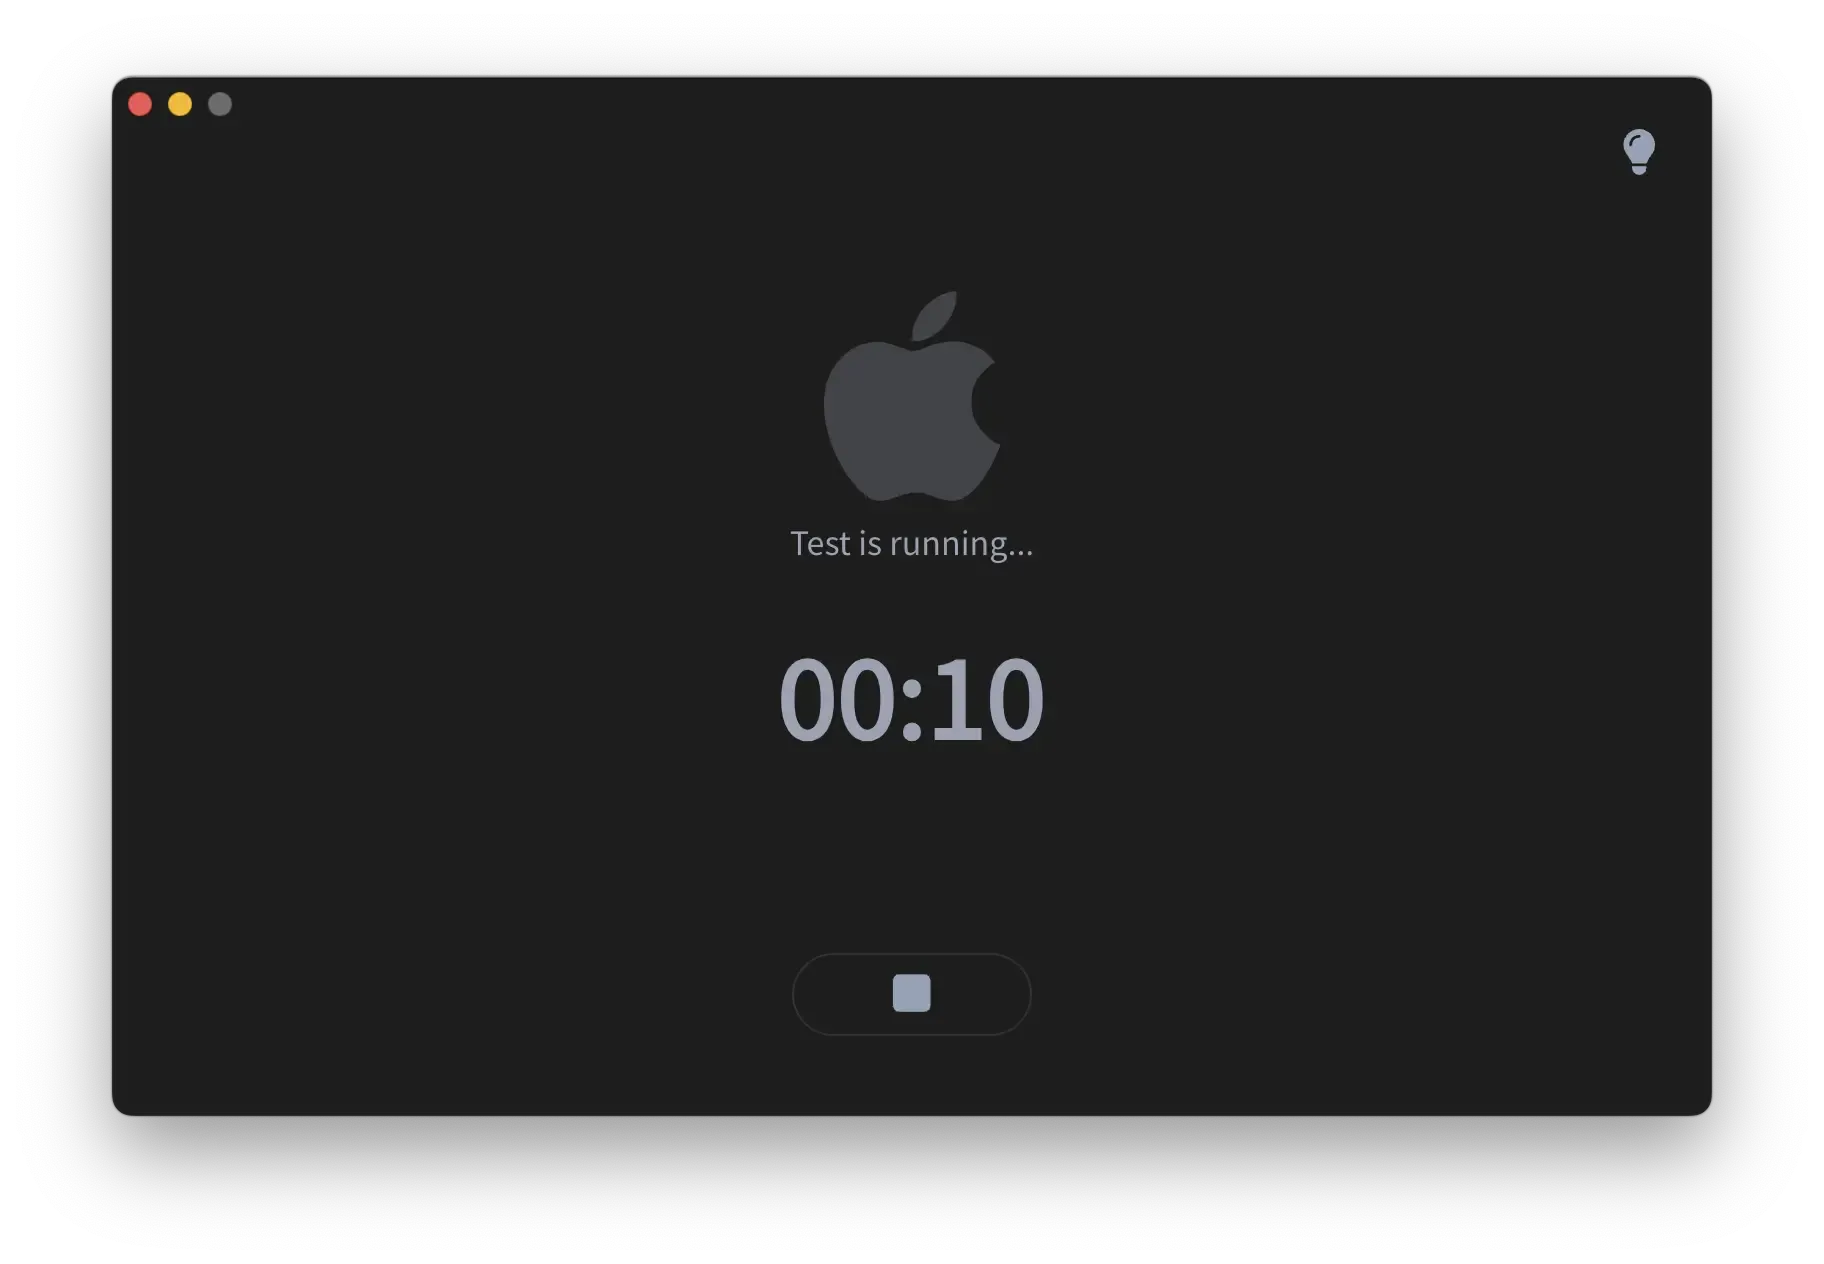
When you see this screen, it means your test has started. This is the moment when you should start using your application on the device. Once you consider your test is finished, press the STOP button.
Once the test is finished, you will be able to select it from your test history. To open a report, simply click on the one you want to see.

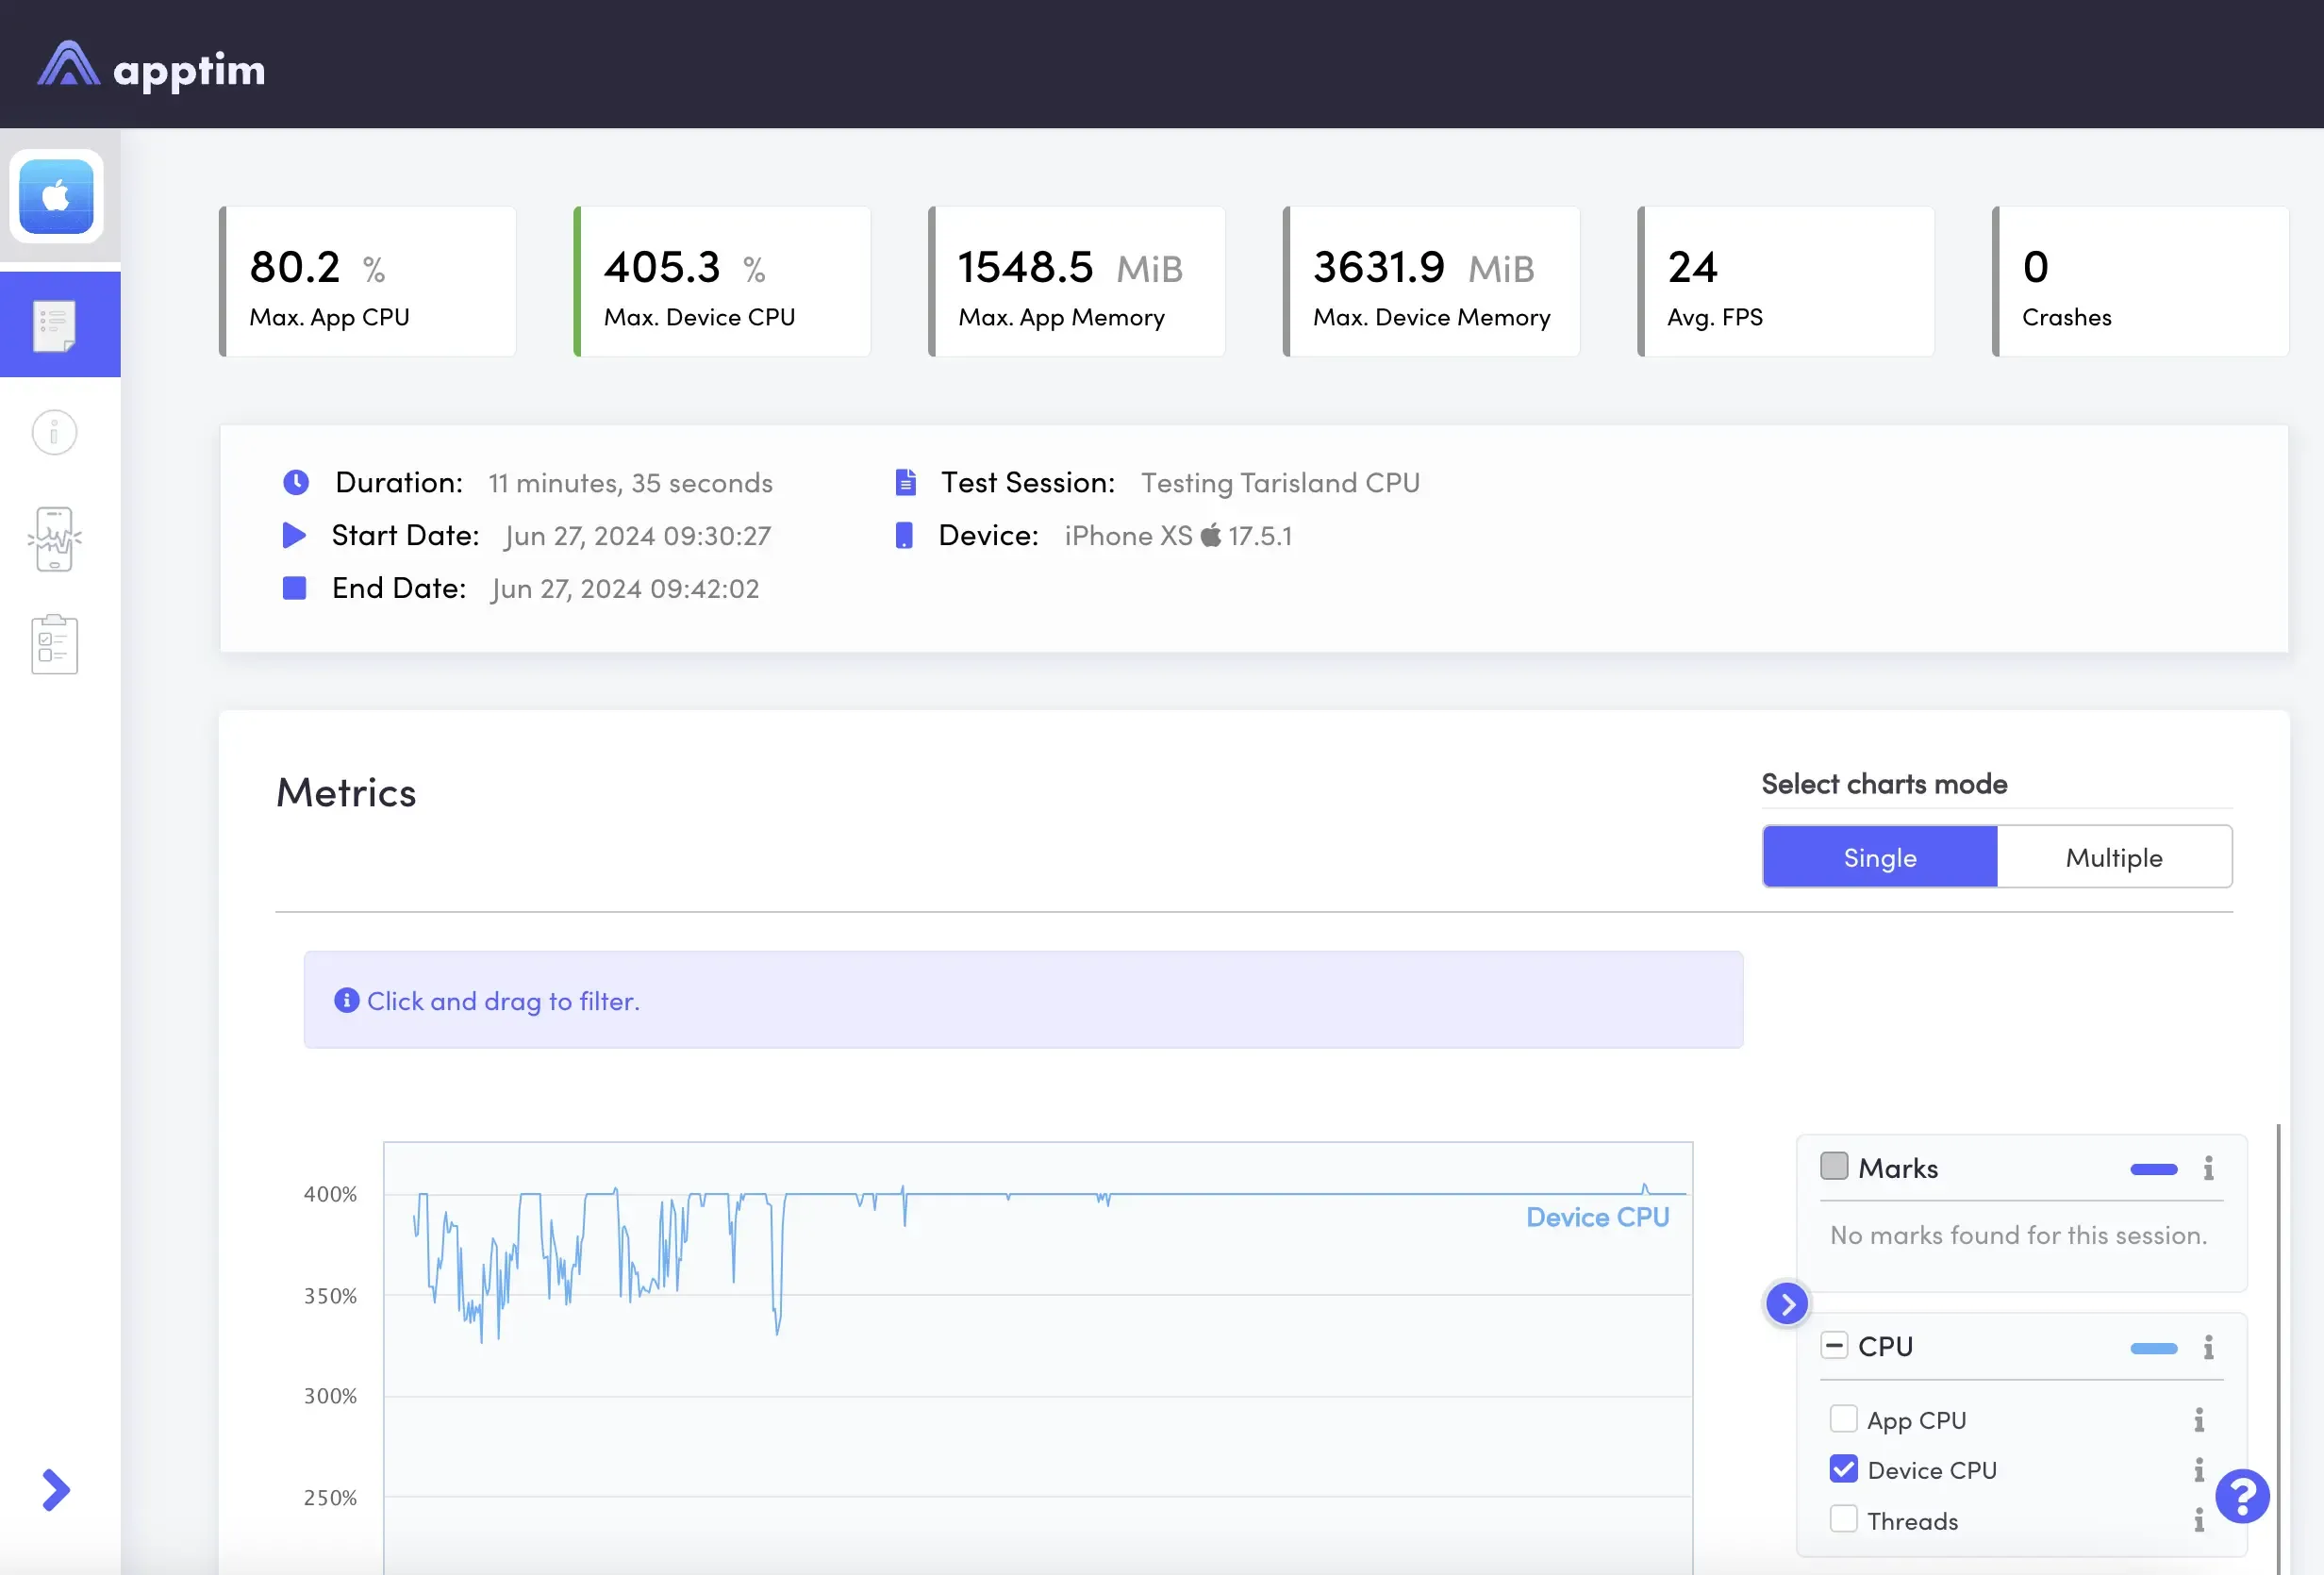
In the following report, we can see that the Max. Device CPU value is within acceptable limits since we indicated in our Thresholds that a moderate value for us was greater than 500% and a concerning value: 700%.
Q: Why does the metric have a green mark?
A: As explained here, you will see a green mark when the metric value is within acceptable ranges.
Q: Why do CPU percentages exceed 100%?
A: As explained here, the CPU metric reports core usage. You can get values greater than 100%, and it’s completely normal. Your maximum value for Max. Device CPU will be the number of cores on your device * 100. So we can say that if your device is an iPhone XS like the one we used for these tests, the maximum value could be 600%.
I hope you find this guide helpful! Remember, testing performance can be as fun as playing a game if you look at it from the right angle. Let’s make our apps run smoother than a freshly buttered slide! 🚀